
The following article outlines how to rotate inspections assignment using the APX Web App. Please note that a user must have the "Inspector Manager" role to complete this task.
- Video Tutorial
- Steps
- PDF Version
1. Video Tutorial
2. Steps
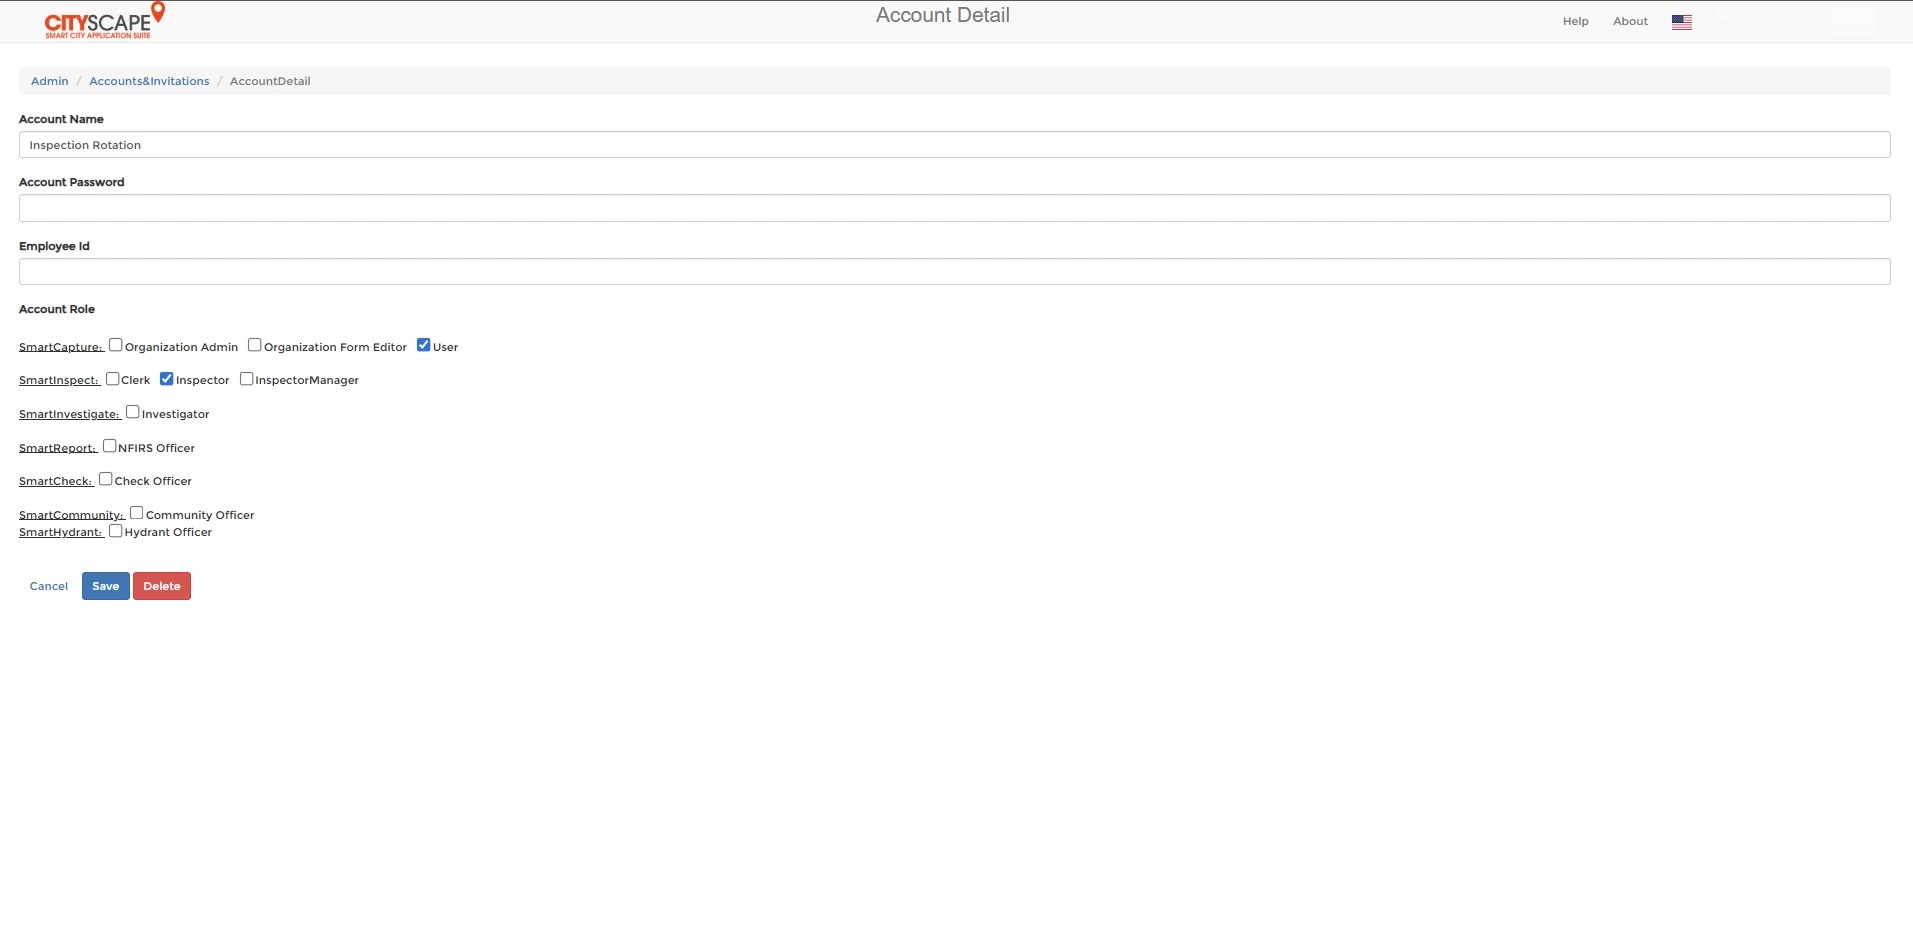
1. If not already created, create an Inspection Rotation account. The account must have the "inspector" role.
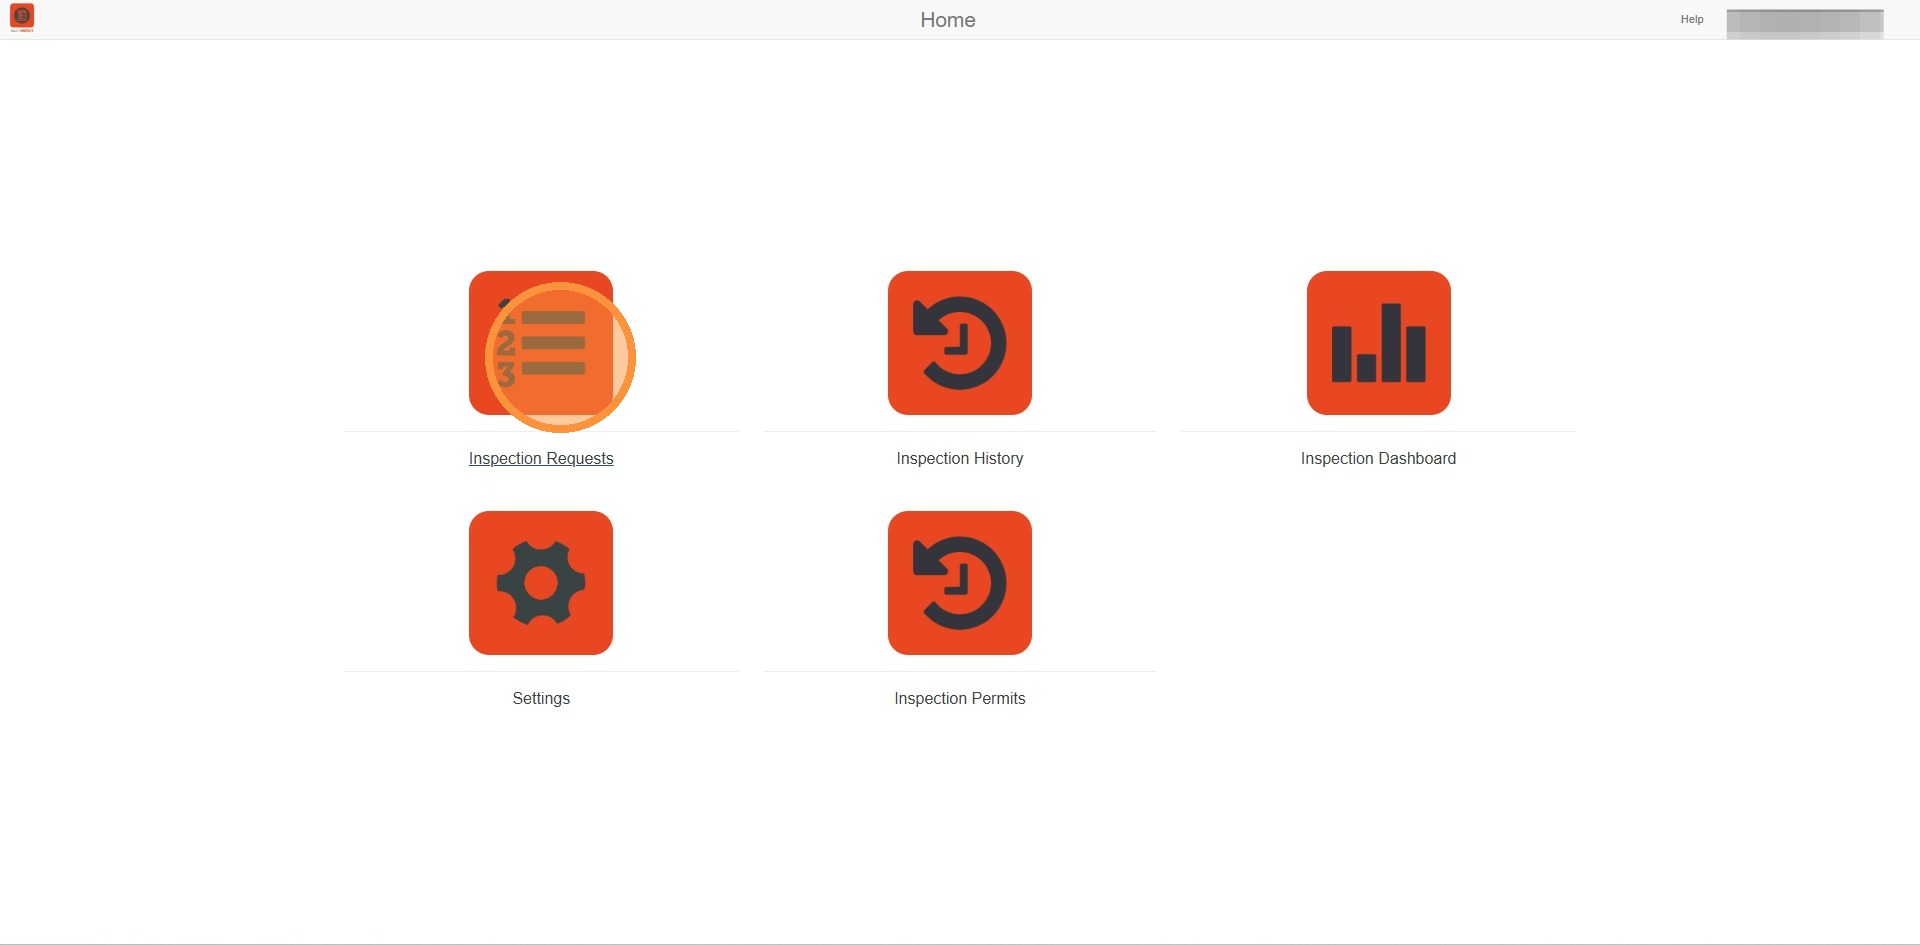
2. In SmartInspect, select Inspection Requests.

3. In the Inspection Requests list, filter on the first account to have inspections rotated. In this example, C Shift is selected.
Click "C Shift -- cshift@apxdata.com"
4. Select the inspections to be rotated. They can be selected individually, per page, or all inspections that meet the current filtering (so in this case, all C Shift inspections).
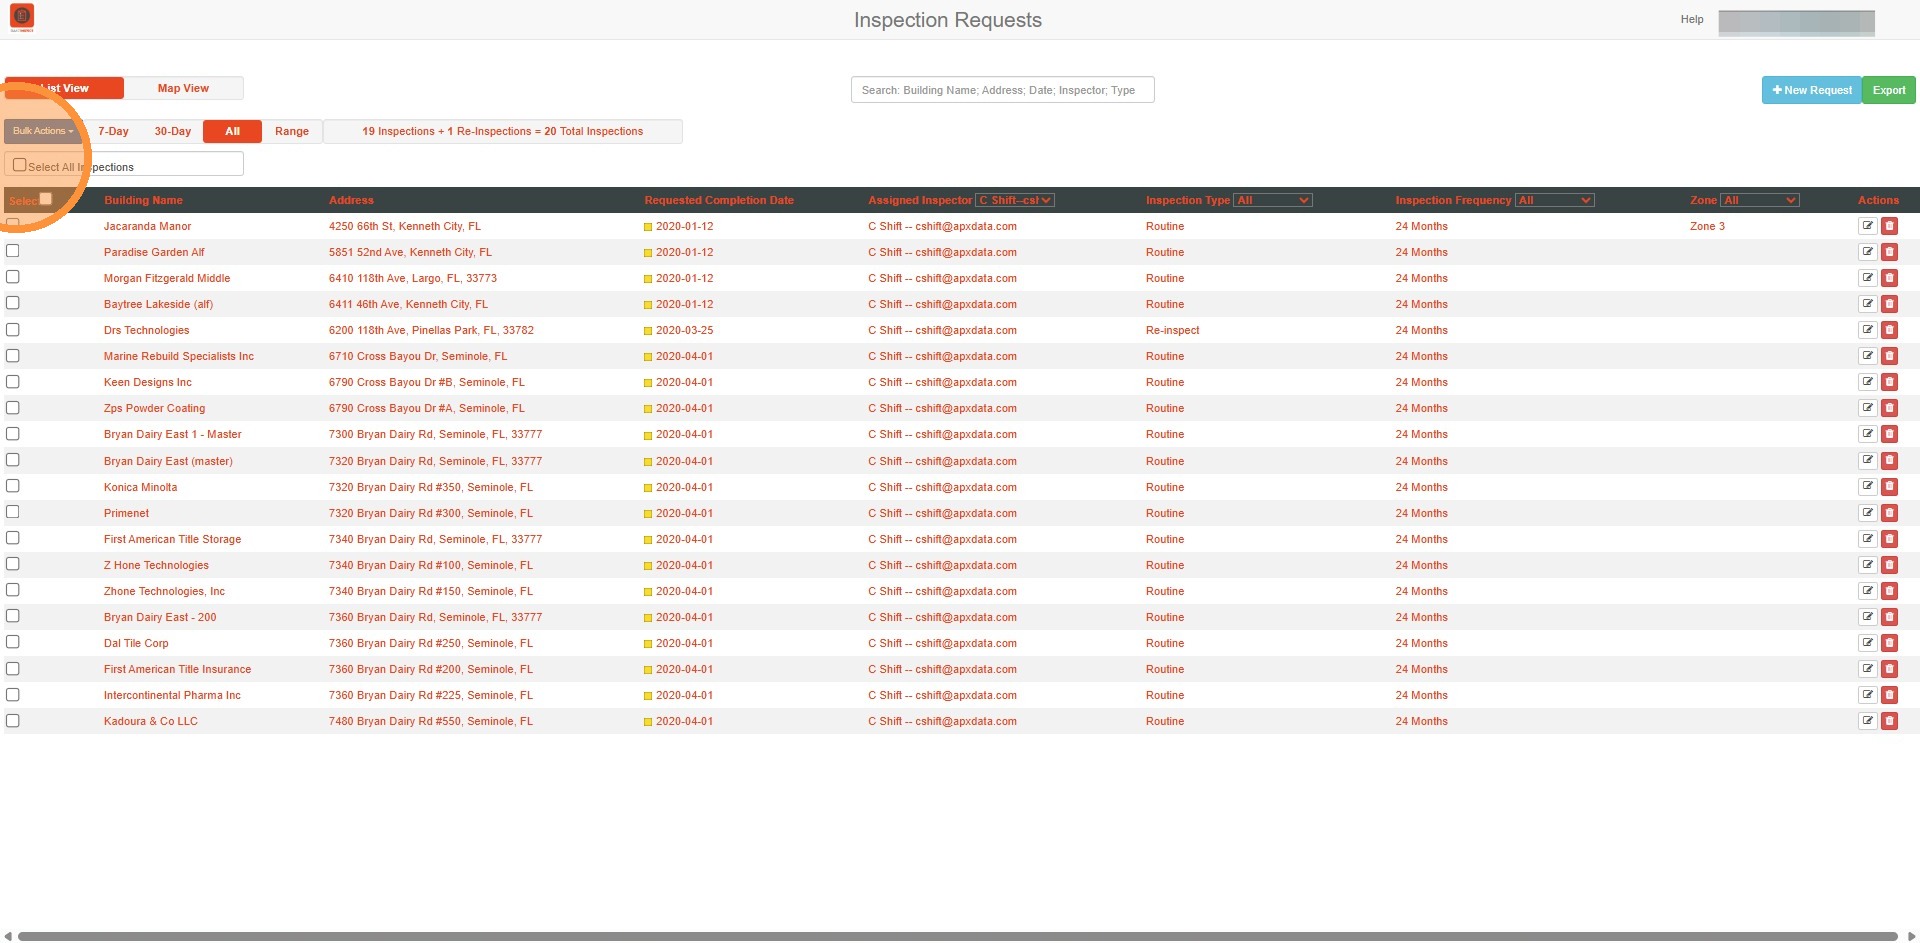
5. Select Bulk Actions.
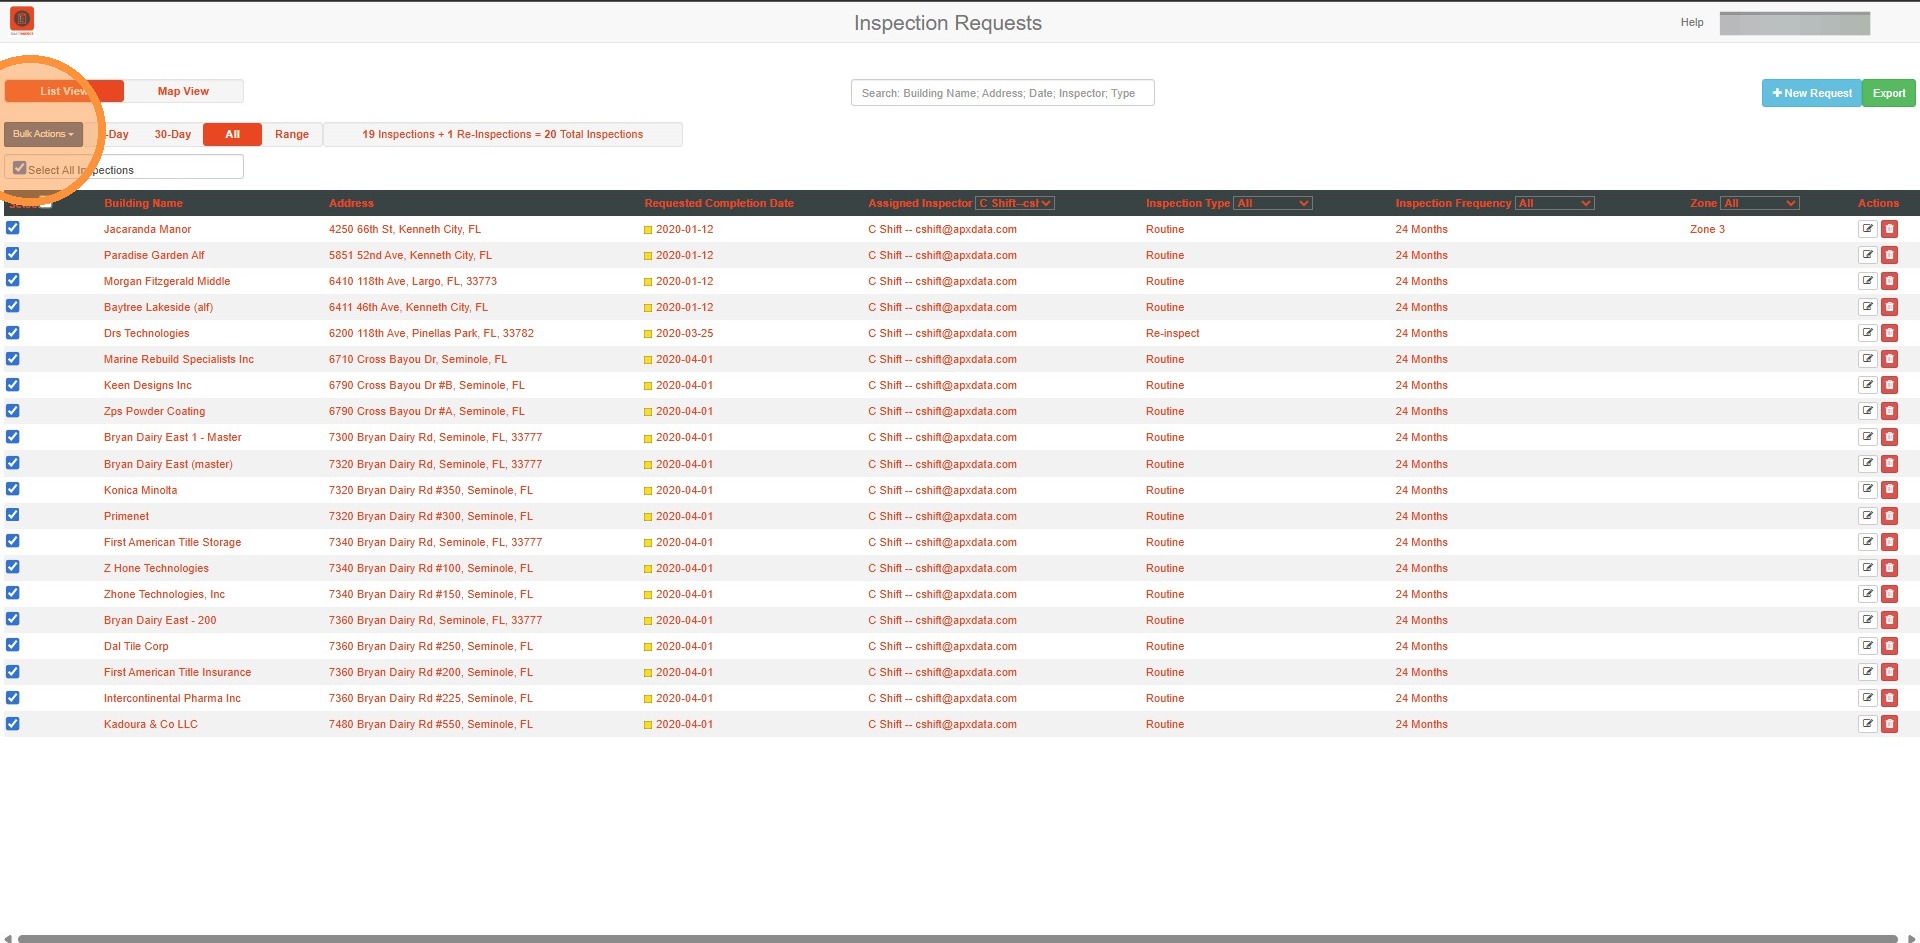
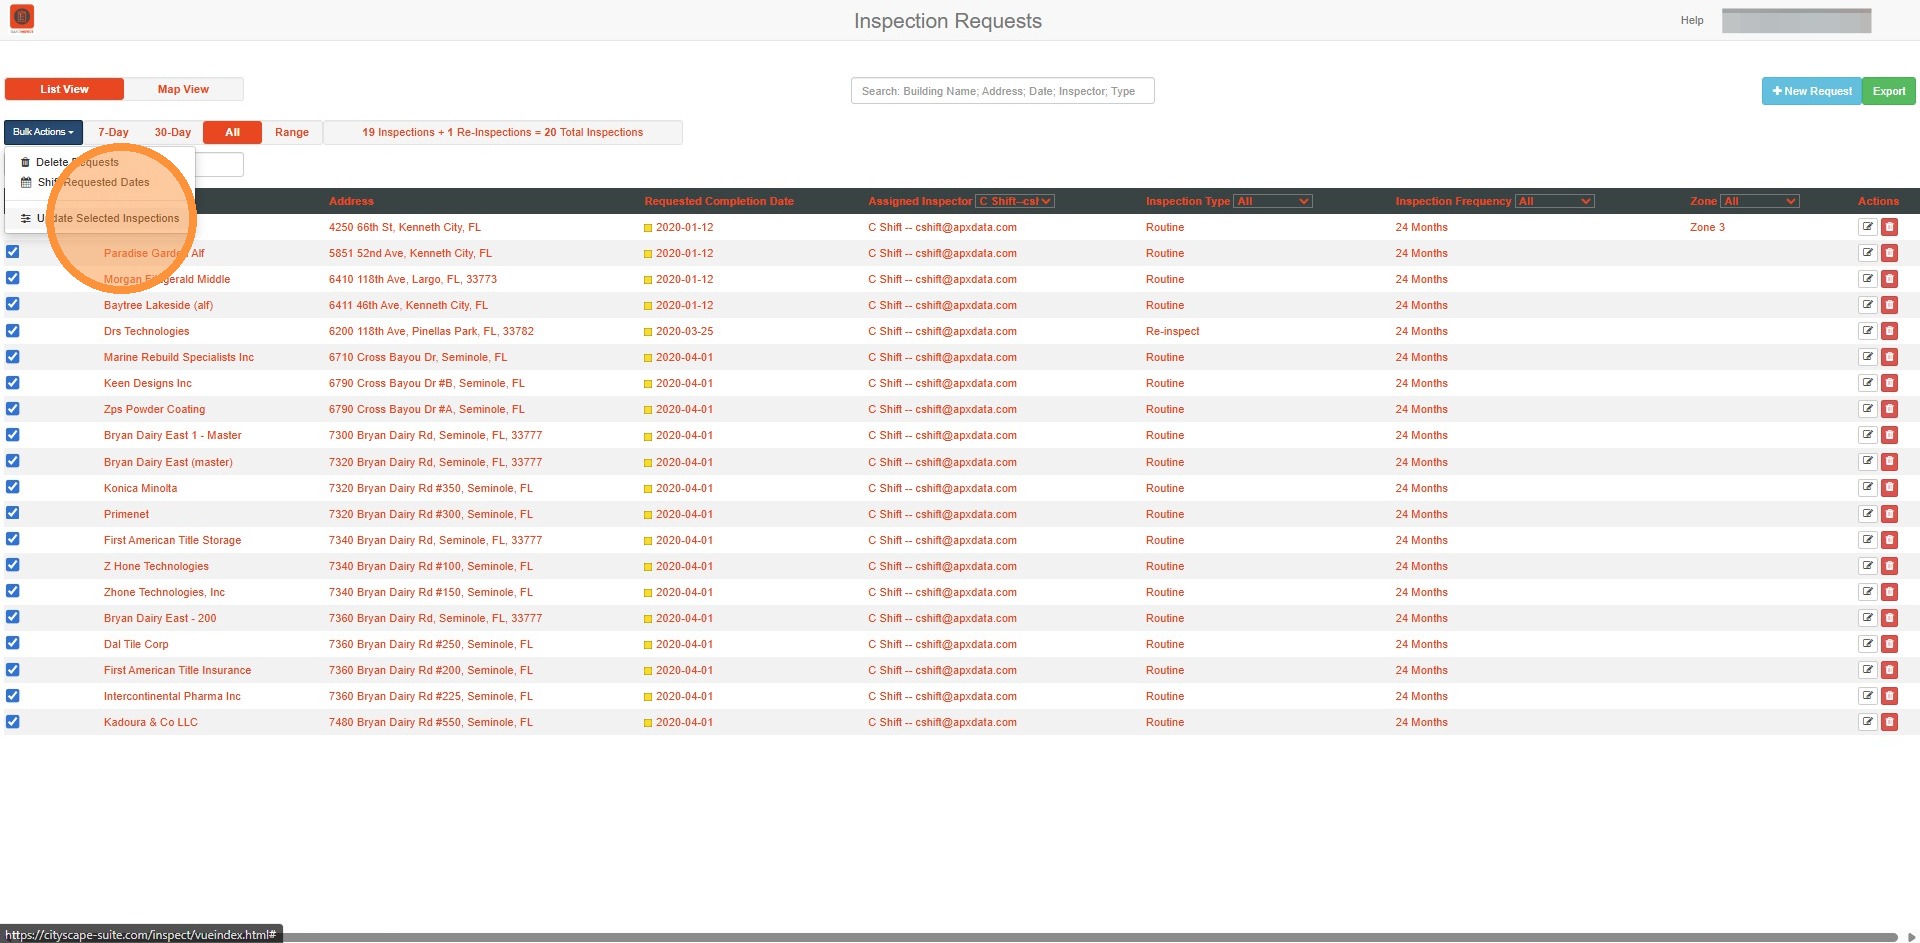
6. Select Update Selected Inspections.
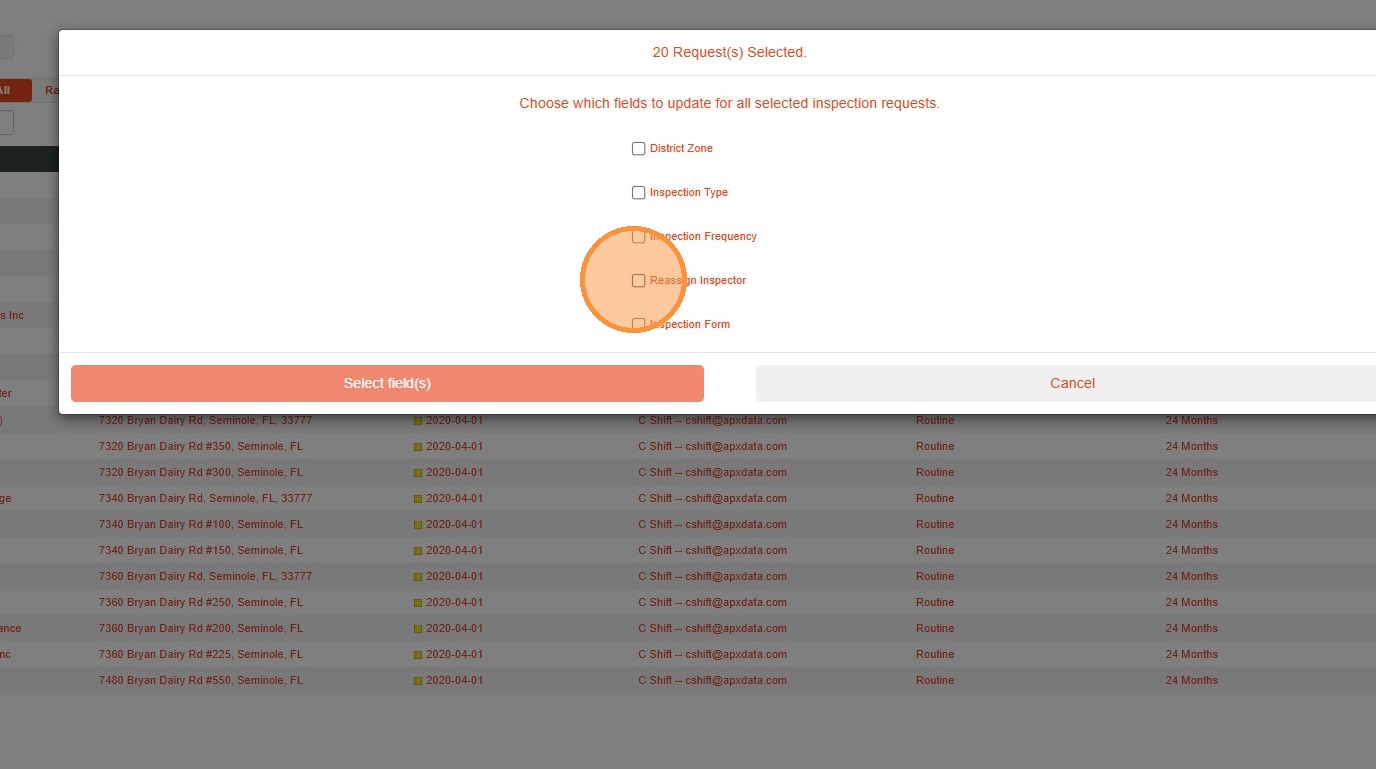
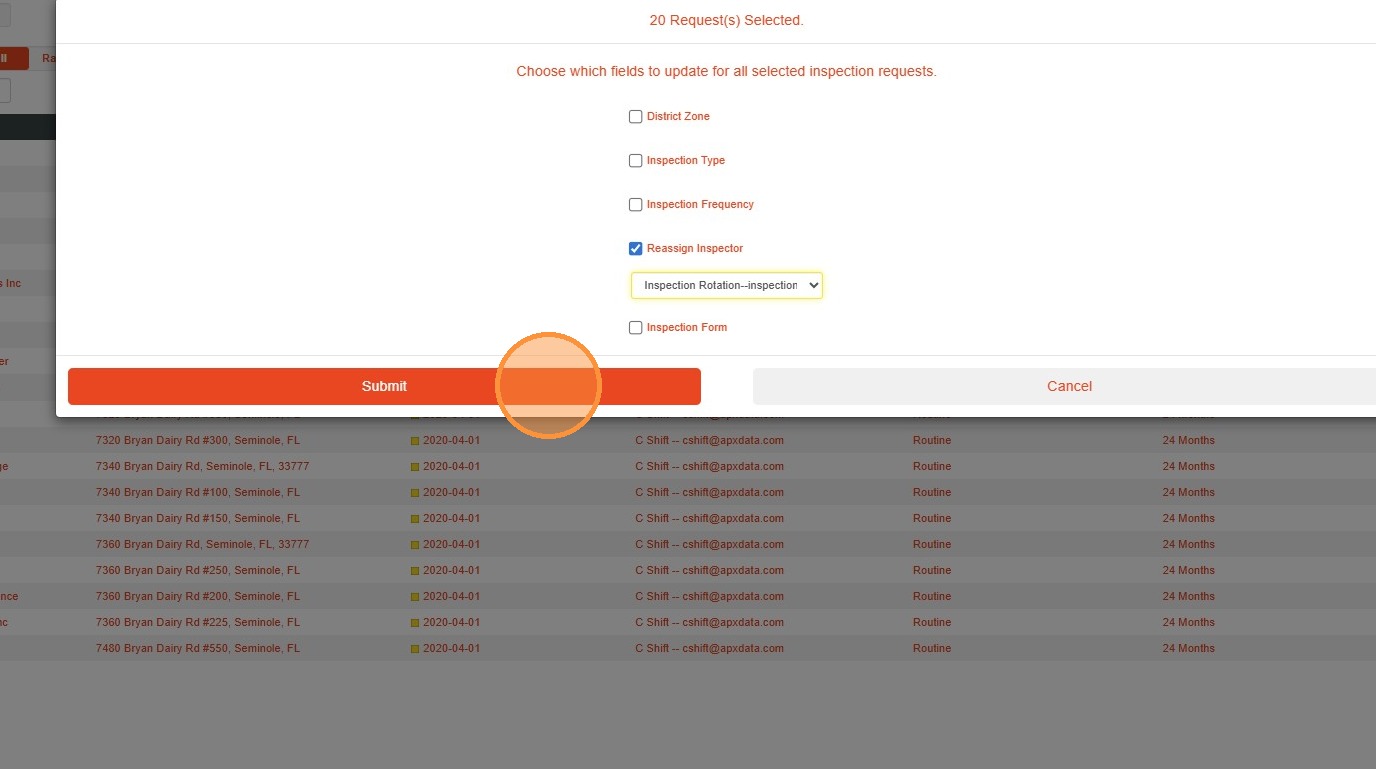
7. In the pop-up, select Reassign Inspector.
8. In the drop-down, select the Inspection Rotation account.
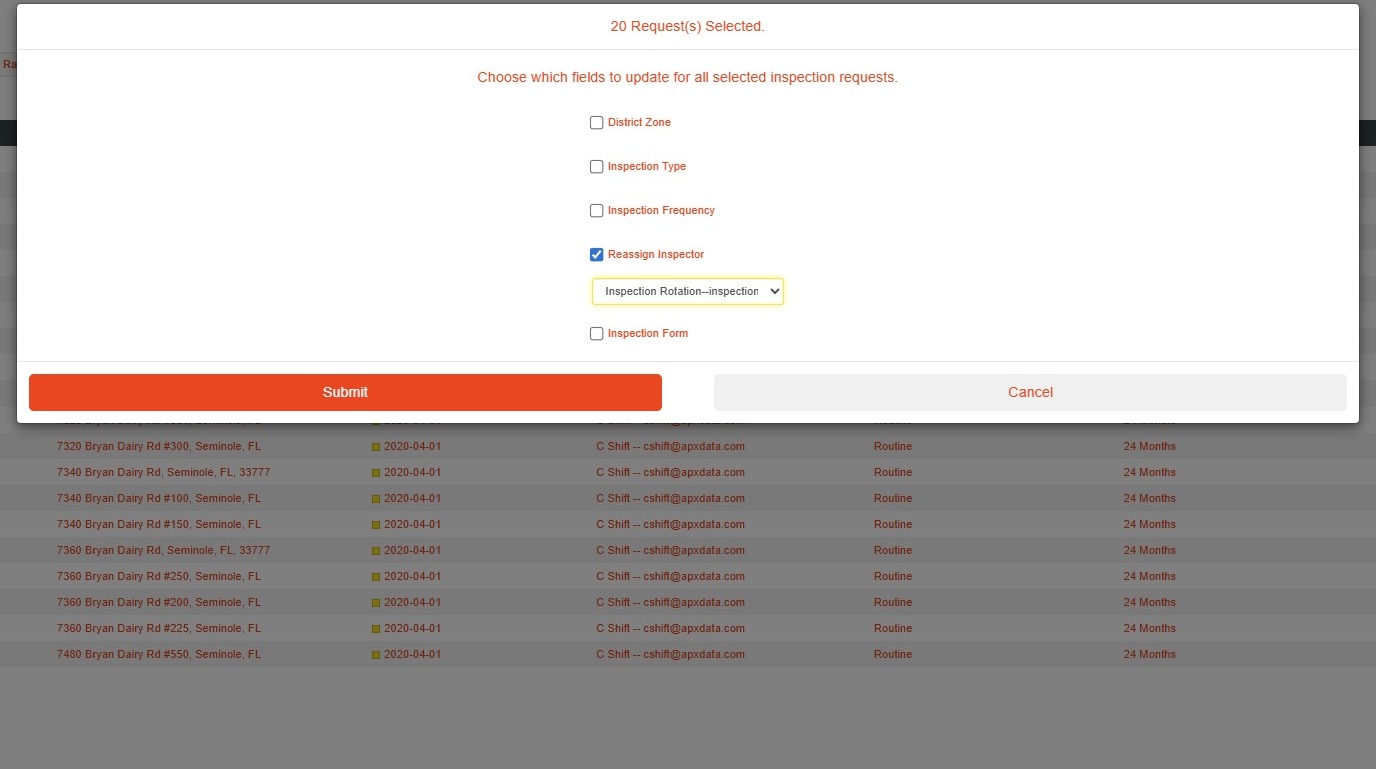
9. Select Submit to complete the rotation of C Shift's inspections to the Inspection Rotation account.

10. Using the Assigned Inspector drop-down, select B Shift and then repeat Steps 5-9, selecting C Shift as the recipient of the rotated inspections.

11. Repeat Steps 5-9 to rotate A Shift inspections to B Shift, and then the Inspection Rotation Account inspections to A Shift.
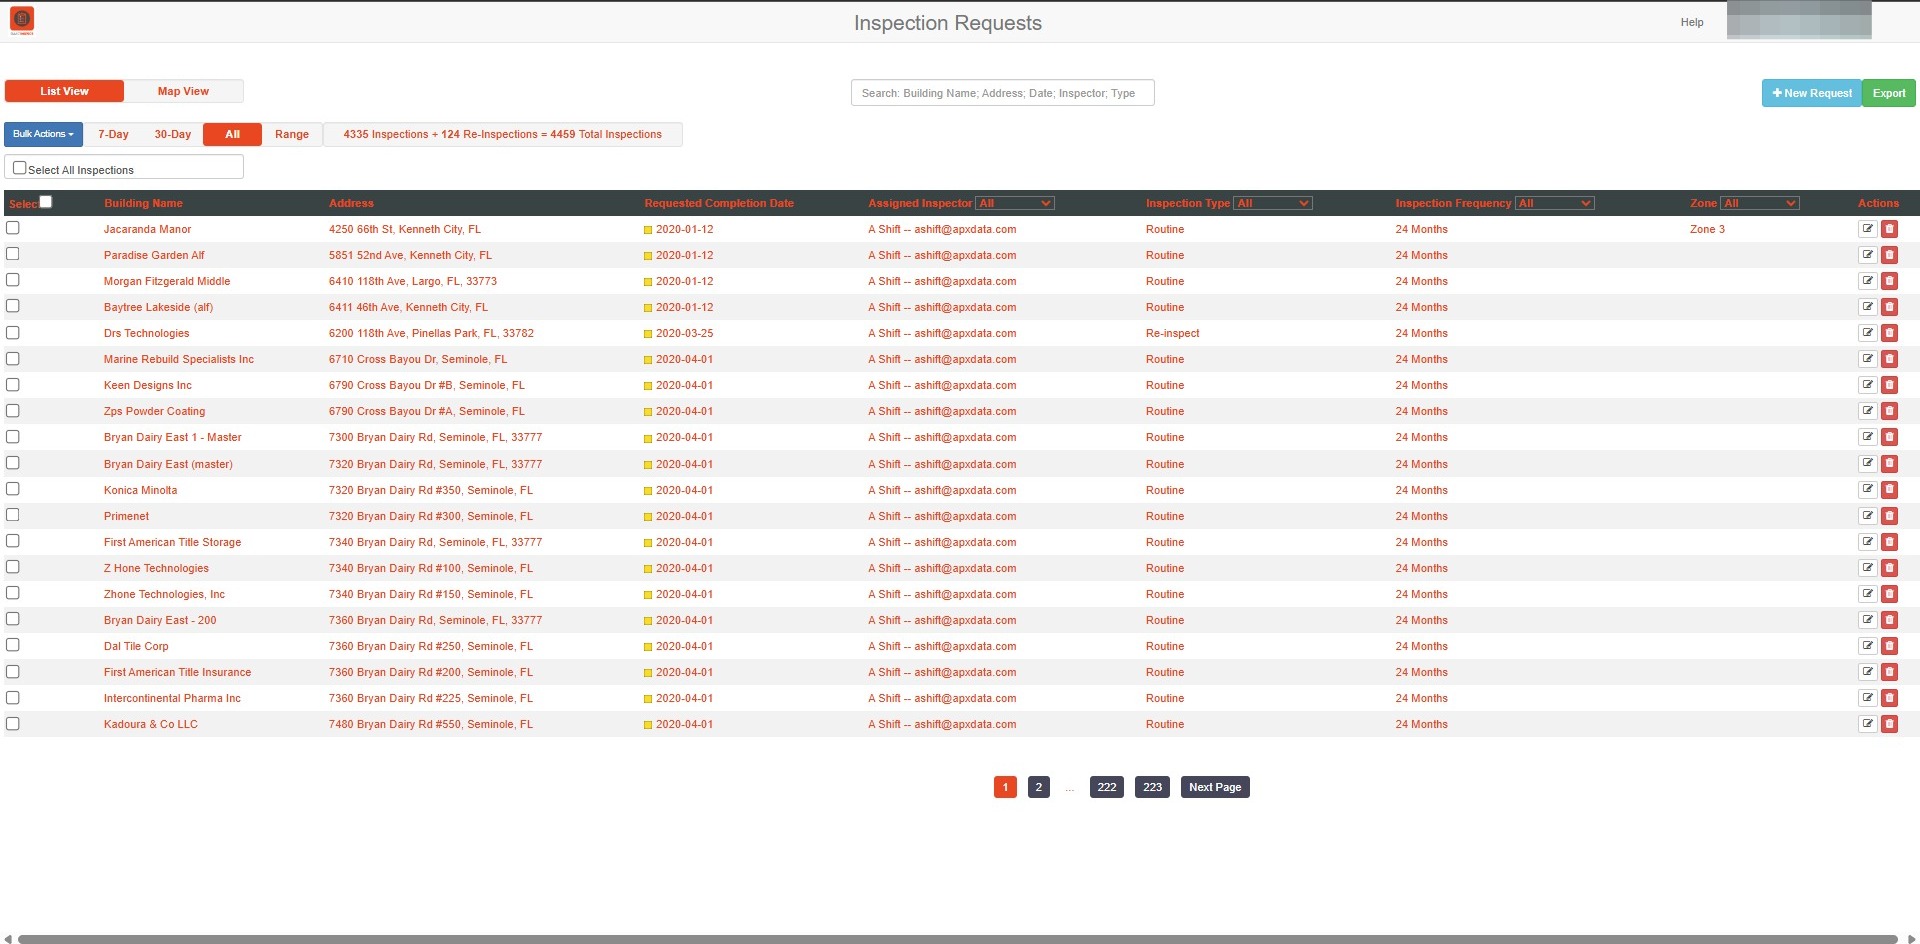
12. Inspections Rotation is now complete.
- C Shift inspections were assigned to A Shift
- B Shift inspections were assigned to C Shift, and
- A Shift inspections were assigned to B Shift
Comments
0 comments
Article is closed for comments.